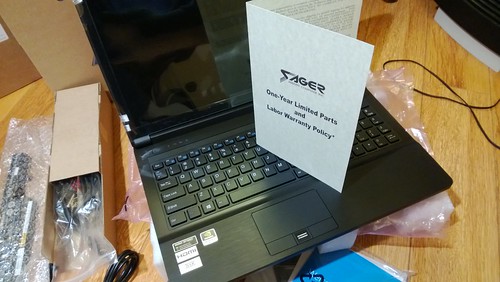
Sager NP6165 Unboxing
Four years ago I wrote a five-part series about my first Sager notebook: “Sager NP7680 Unboxing,” “Sager NP7680 Unboxing: the Box,” “Sager NP7680 Unboxing: The Packing Tape,” “Sager NP7680 Unboxing: Special Keys and the Fingerprint Reader” and “Sager NP7680 Unboxing: Explicit SPDIF Support!” I guess I was five times more interested in blogging five years ago as I see only one Blog post about my new Sager NP6165 (or Clevo W150ER)!
First, the old Sager…
My old Sager aged very well. Those ‘stiff keys’ I complained about the help to “ruggedize” the NP7680. There were only two issues (becoming a problem at the very end):
- My old Sager’s CMOS battery died so the machine can’t keep the current date and time when powered off overnight. Replacing the battery is major surgery: it’s located under the keyboard and appears to be taped down. I could not figure out how to open the chassis to see exactly what was going on…
- My old Sager’s fan vent on the left side began to crumble. The integrity of the plastic grille began to fail under years of hot air blasting through. My new Sager has a different fan-cooling theory based on short bursts instead of a constant push. I think this cooling strategy will save the plastic from becoming brittle.
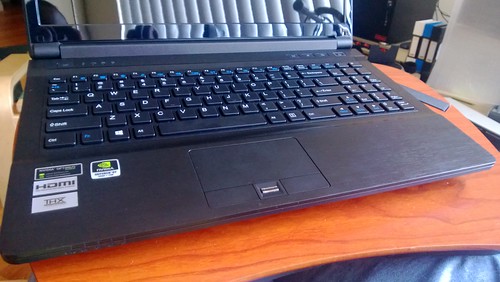
New Chiclet Keyboard
The Chiclet keyboard design is now no longer a premium feature I suppose; this much, much better design has finally trickled down to my lowly price point. It’s a loud and clear answer to my one and only persistent complaint about my old Sager. I do, however, have to get used to the new layout—especially the way the numeric/navigation keys are arranged on the right side. Overall this is an improvement.
Windows-8-Ready Touchpad
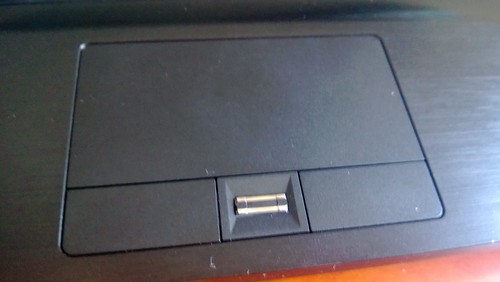
The Sager NP6165 touchpad supports Windows 8 pinches and swipes. It is, of course, small. I find myself accidentally swiping to show charms when all I wanted was to see a horizontal scroll. I look forward to experimenting with larger Windows-8-friendly input surfaces because I am not keen on touching my screens with my fingers.
The touchpad fingerprint reader is not working correctly. I assume that it’s a software problem because my old Sager had no problems with this whatsoever. Perhaps Windows 8.1 will fix this…
Specs
|
Display |
15.6" Full HD LED-Backlit Display with Super Glossy Surface (1920 x 1080) |
|
Video & Graphics Card |
1GB GDDR5 Nvidia GeForce GT 650M GPU with Optimus Technology / Embedded Intel HD Graphics |
|
CPU Processor |
3rd Generation Intel® Core™ i5-3230M Processor (3MB L3 Cache, 2.60GHz) |
|
Thermal Compound |
Stock Standard Thermal Compound |
|
Operating System |
Genuine MS Windows® 8 Professional 64-Bit Edition [$60.00] |
|
Memory |
16GB Dual Channel DDR3 SDRAM at 1600MHz—2 X 8GB [$70.00] |
|
Primary Hard Disk Drive |
120GB Intel 520 Series SATA3 Solid State Disk Drive [$100.00] |
|
2nd Hard Disk Drive |
750GB 7200rpm SATA2 Secondary Hard Disk Drive [$80.00] |
|
Optical Drive Bay—Optical Drive or Hard Disk Drive in Optical Drive Bay with Caddy case |
8X DVD±R/RW/4X +DL Super-Multi Drive & Software |
|
Wireless Network Card |
Internal 802.11 B+G+N Wireless LAN + Bluetooth Combo Module |
|
Primary Battery |
Smart Li-ION Battery Pack |
|
Integrated Security Device |
Fingerprint Reader |
|
Microsoft Office |
Microsoft Office 2013 Trial—Included in Price |
|
Warranty |
Sager 1 Year Limited Parts and Labor Warranty |
|
Additional Battery Pack |
BAT-6165, NP6165 Smart Li-ION Battery Pack (6 Cell, 62.16Wh) [$95.00] |
Related Links
|
“I have done many [dis-assemblies] and [re-assemblies] on Clevo notebooks, I would not recommend it to anyone unless if your warranty was up, or if you are confident with your skills (to not screw it up). If you are just curious about seeing [what’s] inside, you can open the panels on the bottom to see the [hard drive], ram, and CPU. But the rest is more difficult.” | |
|
“Clevo W-Series PREMA BIOS MOD Review [page 13]” |
“There is a little white plug with a red/black wire next to the hard drive bay and RAM. Pull it up and remove it, wait 30 seconds, and then plug it back in. It's the plug for the CMOS battery which you can see in this image, but usually hidden under the hard drive or SSD.” |
|
“If you feel comfortable, Try this, 1st unplug all the power remove the AC Adapter and the Battery. And open the bottom cover (see attachment picture) and unplug the CMOS-Battery’s wire (red & black crop by Green Color) for like 15sec. Then reconnect it back the wire then everything ACA and the Big Battery. See that will help.” |


